DIY Elderberry Gummies: The Great Gummy Showdown (Gelatin vs. Vegan Agar-Agar)
- Jillian Randel
- Nov 24, 2025
- 6 min read


These are so fun and simple to make. My kids helped me too! Thank you! –Sarah
Elderberry gummies are the powerhouse addition to your daily wellness routine, offering amazing immune support and a delicious treat.
I'm going to walk you through two methods—one using traditional gelatin, and one using the vegan-friendly agar-agar—all while keeping your beneficial ingredients safe and sound.
Table of Contents Quick Links
Before You Begin: Syrup Essentials & Safety
If you would like to make your own elderberry syrup, try my recipe here! To learn how to make your own elderberry syrup, and for more in-depth information on the healing properties of elderberries, visit my other blog post on elderberries syrup.
Vegan Agar-Agar Requirement: If you are using the gelatin-free recipe (with the vegan agar-agar substitute), you will have to ensure your syrup is unsweetened (this likely means you will have to make your own) because this recipe specifically requires you to add sugar and boil the mixture. You can use my recipe and just omit the honey!
Method 1: Elderberry Gummies with Gelatin
This is the traditional method for making gummies. Using grass-fed gelatin keeps the overall gummy healthier and creates the most appealing "gummy-like" consistency.
Supplies You'll Need
Metal pan or saucepan
Whisk
Mesh strainer
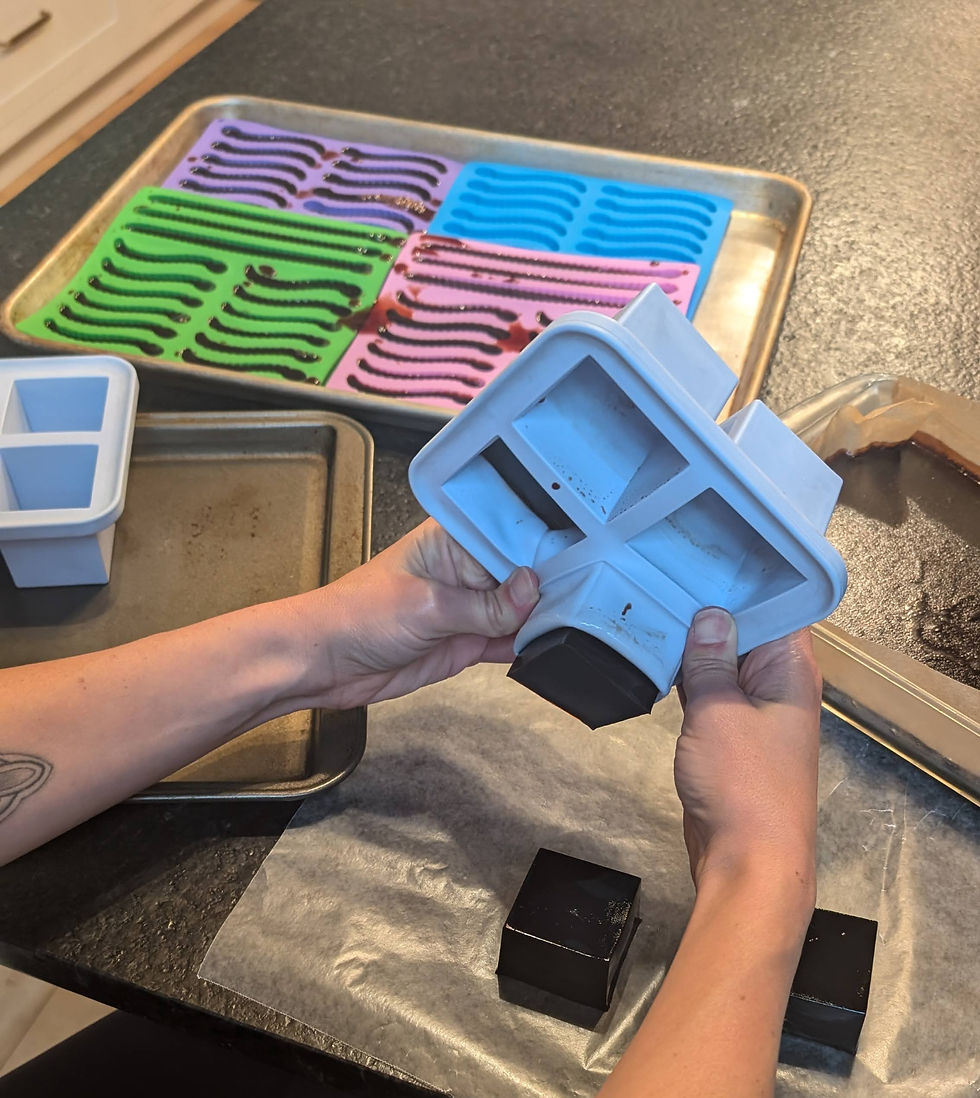
Silicone gummy molds (lay these out on flat baking sheets!) OR use a baking pan lined with parchment paper as a mold
Dropper (these often come with gummy molds as part of a kit) OR you can use a measuring cup with a pour spout
Ingredients
1/2 cup elderberry syrup - room temperature
1/2 cup elderberry syrup - to be heated
3 Tablespoons of gelatin (grass-fed, organic)
Step-by-Step Instructions
Prep the Gelatin: Sprinkle the gelatin into the room temperature elderberry syrup. Allow it to rest for a few minutes. This is called “blooming”. It allows the gelatin to rehydrate and absorb the liquid evenly, without clumping.
Warm the Syrup: Warm the other 1/2 cup of elderberry syrup, but not too hot. You don't want to overheat the honey/herbs that you have infused into your elderberry syrup, so aim for no higher than 104℉ or 40℃.
Combine and Dissolve: Whisk the gelatin and room temperature elderberry syrup together and slowly add it to the warmed elderberry syrup. The warm syrup helps fully dissolve the gelatin. Keep whisking!
Strain and Cool: Once the gelatin is fully combined, strain the mixture into a glass jar. Allow the mixture to cool for a few minutes. Don’t wait too long! The mixture will begin to gel-up quickly.
Fill the Molds: After a short few minutes, use your dropper or measuring cup and slowly transfer the mixture into the gummy molds or onto your parchment-lined baking sheet.
Set Time: Place the gummies on a flat surface in the refrigerator. The gummies should set in about an hour or so.
Storage
The gummies will last, refrigerated, for about 1 to 2 weeks. Make sure you store them in an airtight container. I layer them in glass storage containers with parchment paper separating each layer.

Method 2: Elderberry Gummies with Agar-Agar (Vegan)
Agar-agar is an algae that is a fantastic go-to for vegetarians and vegans who wish to avoid using gelatin. The consistency is noticeable. Not overly weird, but definitely different!
Heads up! This recipe was adapted from the awesome Mountain Rose Herbs blog https://blog.mountainroseherbs.com/elderberry-gummies-made-with-agar
Supplies You Will Need
Metal pan or saucepan
Whisk
Mesh strainer
Silicone gummy molds (lay these out on flat baking sheets!) OR a baking pan lined with parchment paper
Dropper (these often come with gummy molds as part of a kit) OR a measuring cup with a pour spout
Ingredients
1 cup of elderberry syrup, unsweetened
1 tsp of agar-agar powder
6 Tablespoons of sugar
Step-by-Step Instructions
Combine & Heat: Combine all the ingredients in a pot over medium heat, whisking as you heat them.
Activate (Boil!): Keep whisking until the liquid comes to a full, rolling boil. Continue to whisk for 1-2 minutes as the liquid boils. This high heat is required in order to activate the agar-agar's gelling properties.
Strain and Cool: Strain the mixture through a mesh metal strainer. Allow the mixture to cool for about 5 minutes before using a dropper or measuring cup to pour it into the molds or parchment-lined baking dish.
Set Time: Place the molds in the refrigerator. This method will gel-up super fast—in about 30 minutes!
Storage
Demold the gummies and store them in an airtight container in the refrigerator for about a week. The good news? These will freeze well too! Tip: If the gummies stick, pop the molds into the freezer for 5 minutes for easy demolding.

Gelatin vs. Agar-Agar: The Quick Breakdown
Here is a quick comparison of the two gelling agents to help you choose the best method for your needs.
Gelling Agent | Pros | Cons |
Gelatin | - Familiar, "gummy" consistency - Added benefit of collagen - Can be purchased grass-fed and specifically from beef - Tends to be cheaper than agar-agar, even buying grass-fed | - Animal product (not vegetarian/vegan) - Does not freeze well |
Agar-Agar | - Vegan/plant-based - Freezes well, so you can make them ahead of time for everyday supplement use | - Needs to be boiled, meaning beneficial properties of Vitamin C, honey, and other constituents can be lost when boiled - Consistency is less appealing, making it more challenging to convince children and picky adults to eat - Question of how sustainable the harvest of agar-agar from the ocean is |
Author's Note on Preference
As you can see in this breakdown, I favor the method that uses gelatin. I want to love the agar-agar method, but that is not the case. I also think that being able to utilize all parts of animals (gelatin) is a way of honoring their sacrifice, however unwillingly it was made.

Getting Your Sour On: Tips for Tart Gummies
Want to take your gummies from sweet to sour? These methods work for both the gelatin and the agar-agar recipes above! For the substitutions mentioned below, I make them in the room temperature half of the elderberry syrup because all of them have either citric acid and/or vitamin C, and neither like high heat!
Lemon Swap: Substitute some of your elderberry syrup with lemon juice (I substitute about 2 Tablespoons).
Citric Acid Boost: Add 1-2 teaspoons of citric acid directly to your recipe. Do this after the syrup has cooled, but before you pour it into the molds–citric acid does not respond well to high heat. I have never had problems with this, but they do occur. This is my favorite method for making sour elderberry gummies.
Tart Cherry Juice: Substitute tart cherry juice for some of your elderberry syrup (I have done as much as a 1:1 ratio—1/2 cup of tart cherry juice and 1/2 cup of elderberry).
Make it look (and taste) like a sour patch kiddo!
For the iconic sour patch texture, roll the outside of your finished gummies in a simple mixture of sugar and citric acid. The ratio you choose will determine the sourness:
For mildly sour: Use a 4:1 ratio (4 parts sugar to 1 part citric acid)
For intermediate sourness: Use a 3:1 ratio (3 parts sugar to 1 part citric acid)
For very sour: Use a 2:1 ratio (2 parts sugar to 1 part citric acid)
I actually like this method the least. I find that coating the outside leads to the gummies “sweating” which makes the appearance less appetizing and storage a lot trickier, so I usually opt to add the citric acid into the mixture before it gels up or have people roll their own sugar as they eat them.
Conclusion
Whether you prefer the classic chew of gelatin or the plant-based agar-agar, both methods provide a delicious, chemical-free alternative to store-bought supplements. Start mixing, filling, and chilling today, and enjoy the satisfaction of knowing exactly what goes into your family's wellness routine.
Important Syrup Note: When purchasing elderberry syrup, be aware that many of them have alcohol added to make them shelf-stable--this is OK in terms of the process (just like making a jello shot) but you need to be aware of this if you are feeding your gummies to anyone with an alcohol aversion. I generally use alcohol-free elderberry syrup for gummies because I am making my own syrup and gummies and there is no point in adding an alcohol preservative because I will be eating them ASAP.
Disclaimer: These statements have not been evaluated by the Food and Drug Administration. These recipes, methods, and resulting products are not intended to diagnose, treat, cure, or prevent any disease and are for educational purposes only. The Undercover Witch LLC recommends that you consult with a qualified healthcare practitioner before using herbal products, particularly if you are pregnant, nursing, or on any medications.

Comments